 |
|
|
|
|
Surface Preparation
Plastics and Glass: Temperature Requirements
|
|
|
|
|
|
|
Surface Preparation
Plastics and Glass: Temperature Requirements
|
|
Installation
The graphic consists of three separate pieces...
|
 |
|
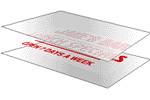
STEP 1: Using small tabs of masking tape, tack the graphic to the intended surface. This is to insure proper placement before the liner is removed. |
 |
|
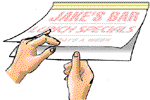
STEP 2: Apply a single horizontal strip of masking tape to the top of the graphic. The strip of masking tape should be split between the graphic and the intended surface (as shown). This strip will be used as a hinge that will insure the graphic does not move during the application process. |
 |
|
STEP 3: Hold the bottom edge of the hinged graphic away from the intended surface and remove the liner to reveal the sticky backing of the vinyl. Save this piece of liner for use later in the application process. |
 |
|
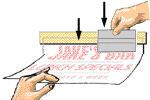
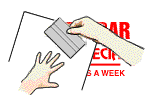
STEP 5: While still holding the hinged graphic away from the intended surface. Using the squeegee and starting from the top, begin to marry the graphic to the intended surface. |
 |
|
IMPORTANT NOTES: |
|
|
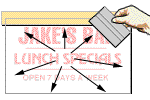
STEP 6: Once the graphic is in proper position and lying perfectly flat on the intended surface, press down firmly in the middle, and with your finger, squeegee or a credit card, rub out towards the edge from the middle (as shown). |
 |
|
STEP 7: It is now time to remove the pre-mask from the graphic and reveal the final product. Gently and slowly remove the pre-mask at an 180 degree angle back over itself. |
 |
|
STEP 8: Squeegee out any remaining air bubbles (if any) using the piece of left over liner. Lay the piece of left over liner over the graphic with shiny side of liner facing you. Proceed to apply hard pressure to squeegee out any remaining air bubbles. |
 |
|
|
|
takes very little time, it is not something to rush. With a little concentration and patience you can easily install quality vinyl graphics. Enjoy your new decal! |